User Guide
Register User
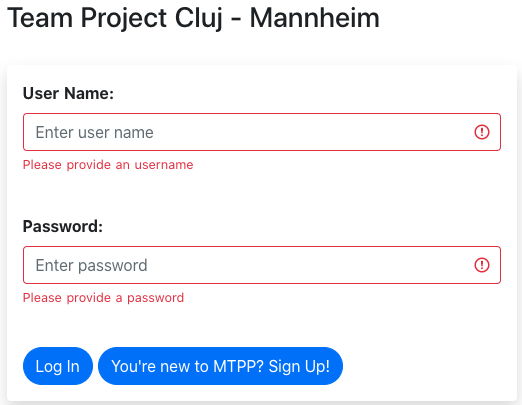
Before you can start with the MTPP you have to register your own user.
Click on the Button “You’re new to MTPP? Sign Up!”.
Enter a username and your password. Confirm by clicking “Sign Up”.
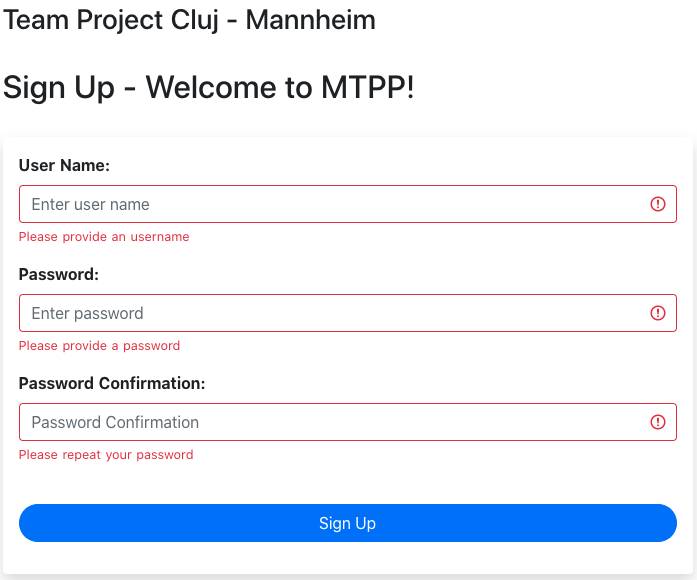
Now your account is created successfully. You can add our bundle of predefined Functions and APIs to your account, if you acquired the activation code.
Check “Add bundles to my account (activation code required)” and enter the activation code in the field. To confirm click “Load built-in features!”.
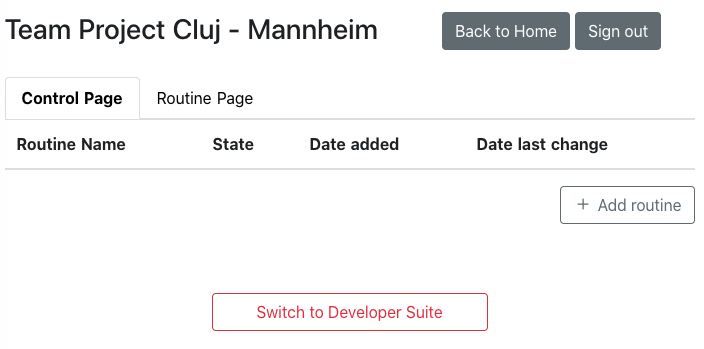
After the bundle was added to your account go to the Control page by clicking “Go to Control Page!”.
Create a routine
After a user account was created and some Functions and APIs were load to the account either manually or by using the predefined bundle, routines can be created by the user.
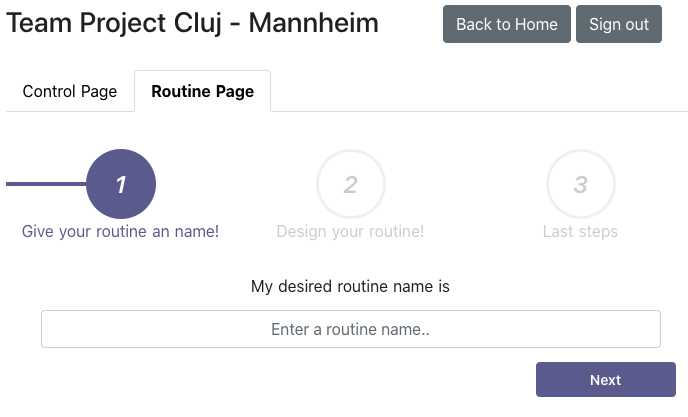
On the Control Page click on “Routine Page” or “+ Add routine” to create a new routine.
Enter the routine name and confirm with “Next”.
On the appearing page you can add and edit the routines components.
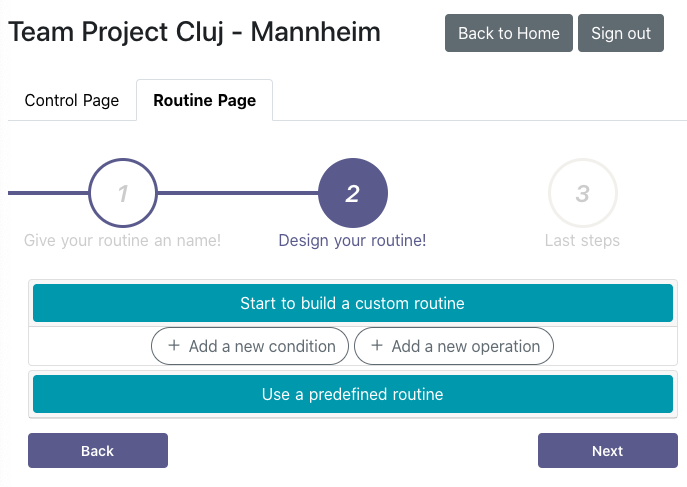
A Routine behaves like a workflow in which each Component is treated sequentially. A Routine can consists of the components Conditions and Operations. Both are structured in categories where similar types of Components are clustered. Conditions have to be fullfilled for the Routine to continue. If the condition is not fullfilled the Routine will interrupt. One very important Condition is the timer Condition “Routine start time” which checks checks if the current time equals the specified time to start the Routine. An Operation can be anykind of action or request to an external service. Each operation can have different input fields and one return value.
Let’s start with adding the timer Condition “Routine start time”.
Click on the “Add a new Condition” button. Then select the timer category in the appearing dropdown menu. Finally select the “Routine start time” Condition in the second dropdown.
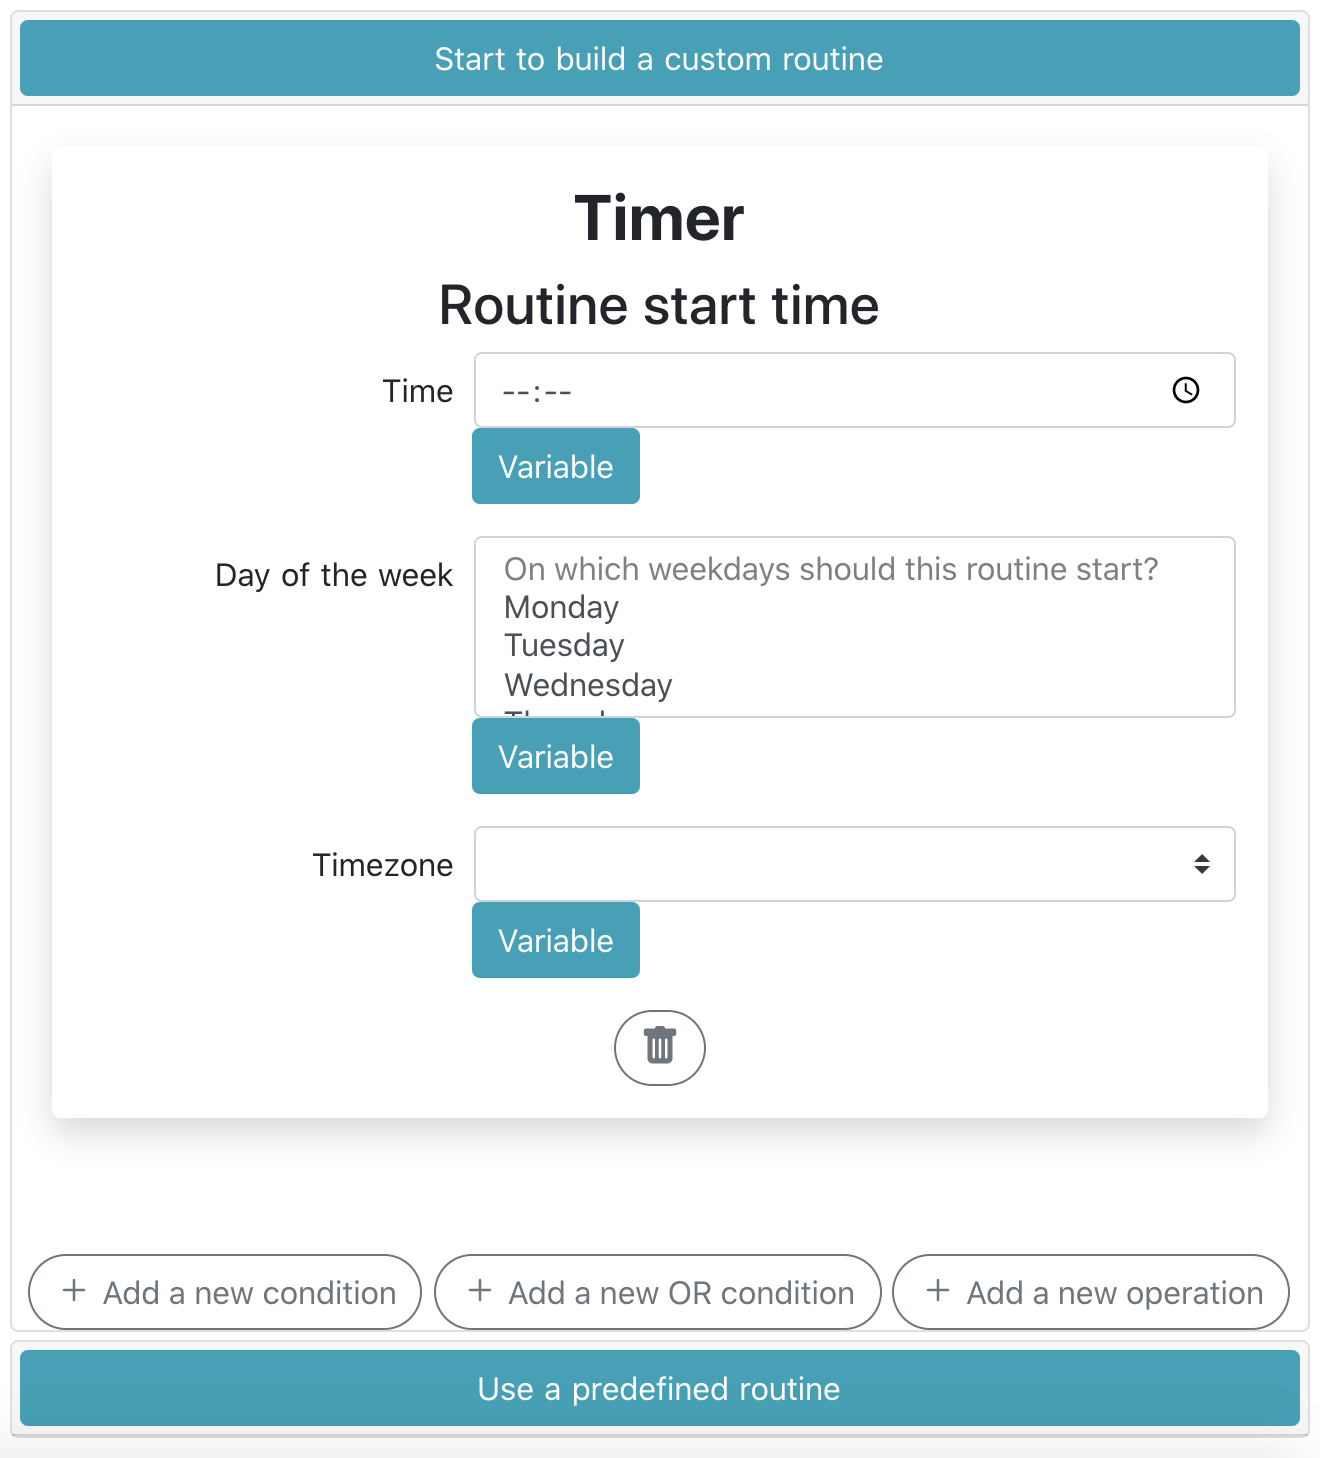
Specify a time, day and timezone at which the Routine should start.
Next we can choose an Operation we want to append next.
Click on the “Add a new operation” button.
You can now choose any category you like to add the corresponding operations. We want to retrieve the stock price of Google.
Select “Finance” in the dropdown and select “Retrieve Stock Price of a Company”.
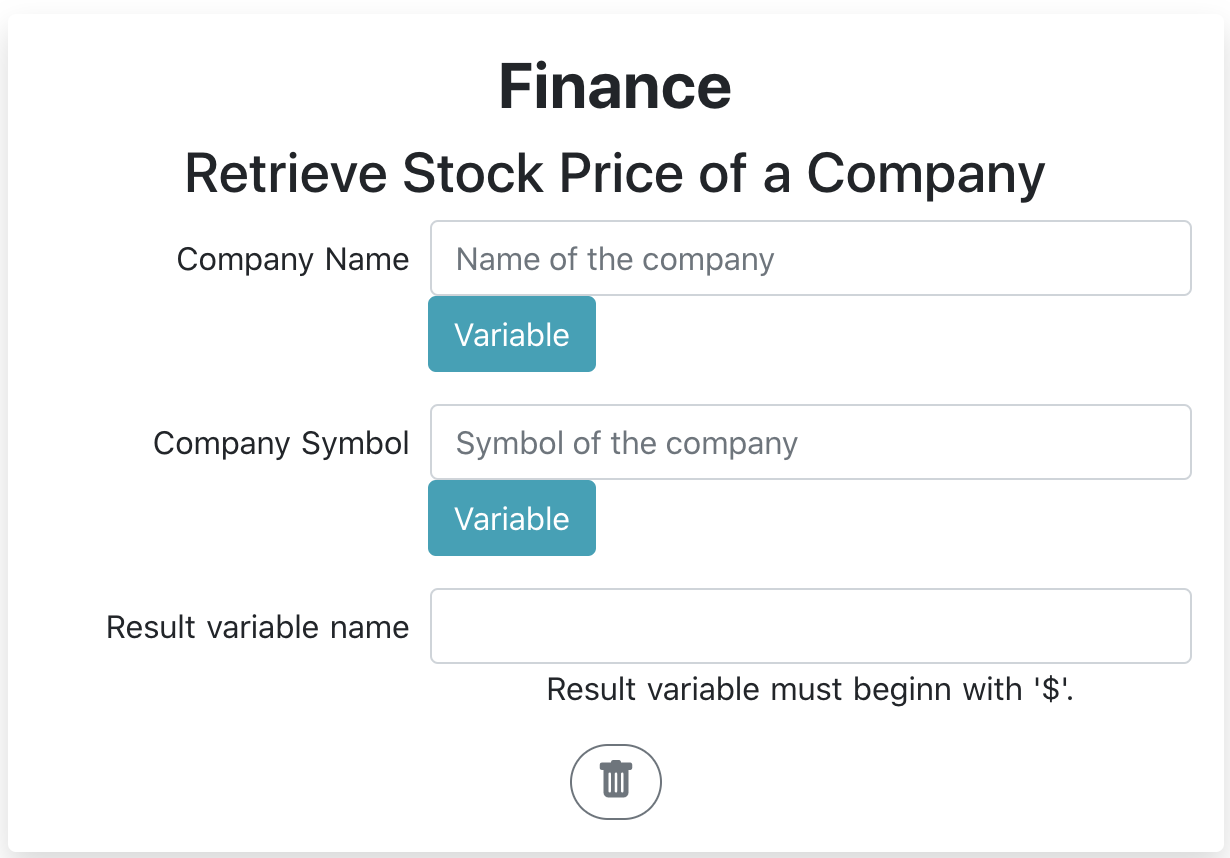
In Operations the results can be saved in variables so they can be used in other components. The result variable name is specified in the “Result variable name” field. The variable name has to start with a Dollar sign “$” to indicate that it is an variable and can be used in other Component’s fields. In string fields we can just write the variable name including the Dollar sign. In number fields we have to change the field to variable mode by clicking the variable button and then selecting the variable name. The variable mode can be left by clicking the variable button again.
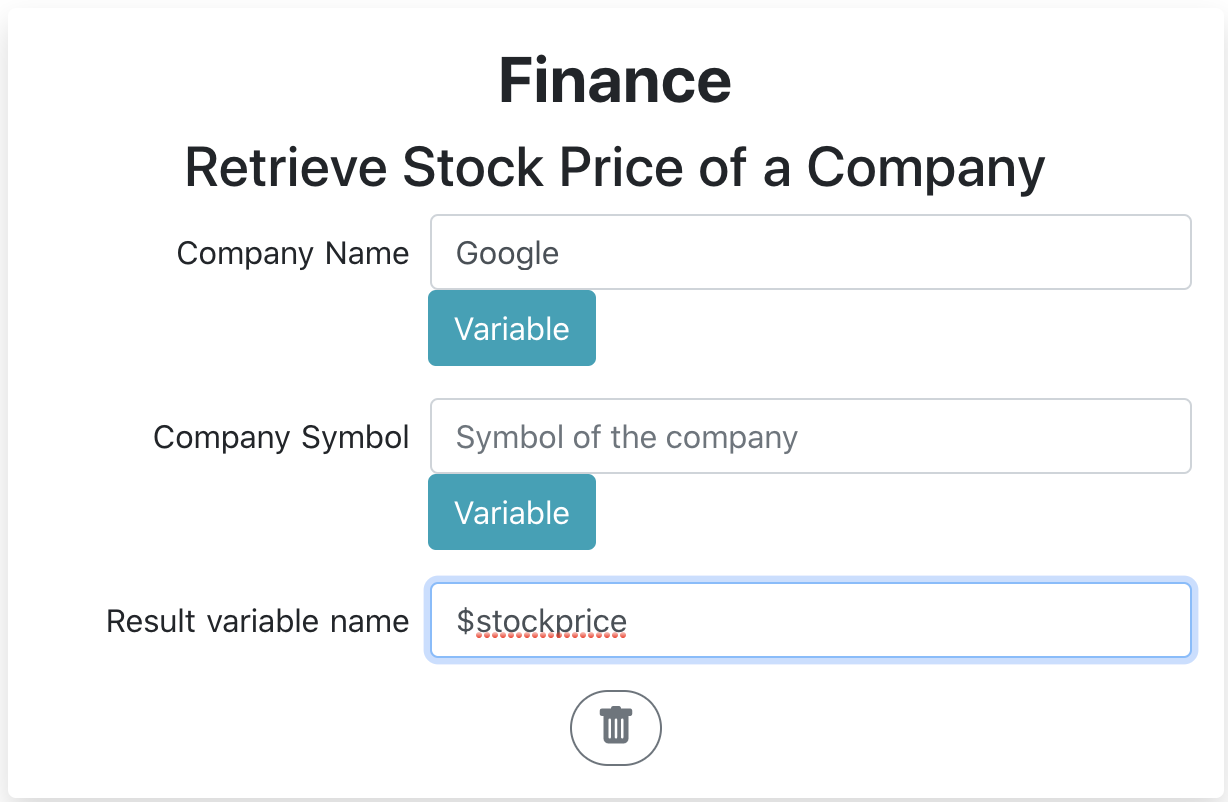
Enter “Google” in the Company Name field and “$stockprice” in the “Result variable name” field.
Next we want to compare the stockprice to the fixed number 445 with the Numbers Condition “Relation between two numbers”.
Click on the “Add a new Condition” button. Then select the Numbers category in the appearing dropdown menu. Finally select the “Relations between numbers” Condition in the second dropdown.
This condition has three fields, the two values to compare and the operator. Remember that the value fields are normally numbers only fields.
Click the “Variable buttong below the “Left Value” field and select the “$stockprice” variable. Select “Greater than” in the Operator dropdown. Finally type “445” in the “Right Value” field.
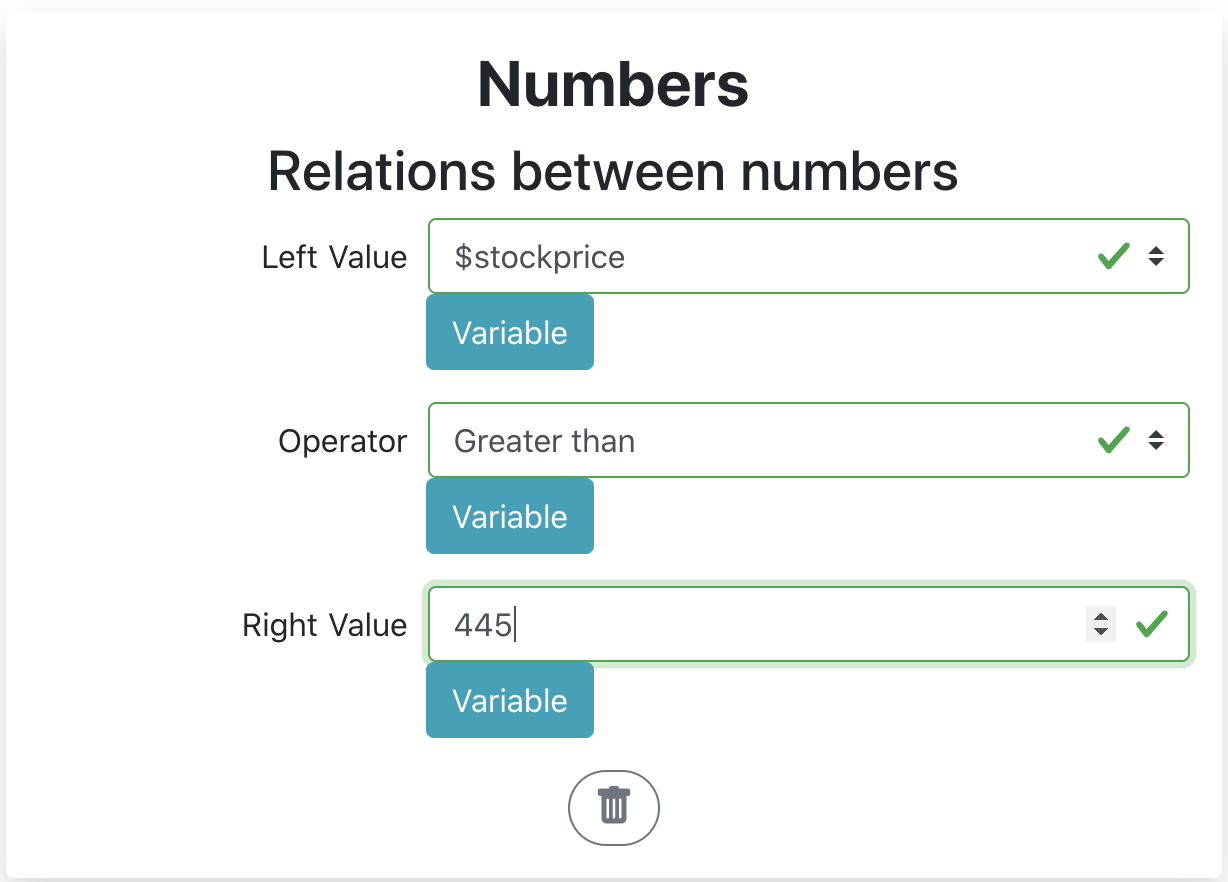
If the Condition is satisfied i.e. the Apple stock price is greater than 445, the Routine will continue with the following components. If not, it would stop.
We now specified our first Routine with three Components. It would make sense to continue the Routine with additional Operations after the Condition was successful but for now this is enough to show you all functionalities.
Before starting the Routine we want to save it so our account.
Click the “Next” button on the bottom right corner.
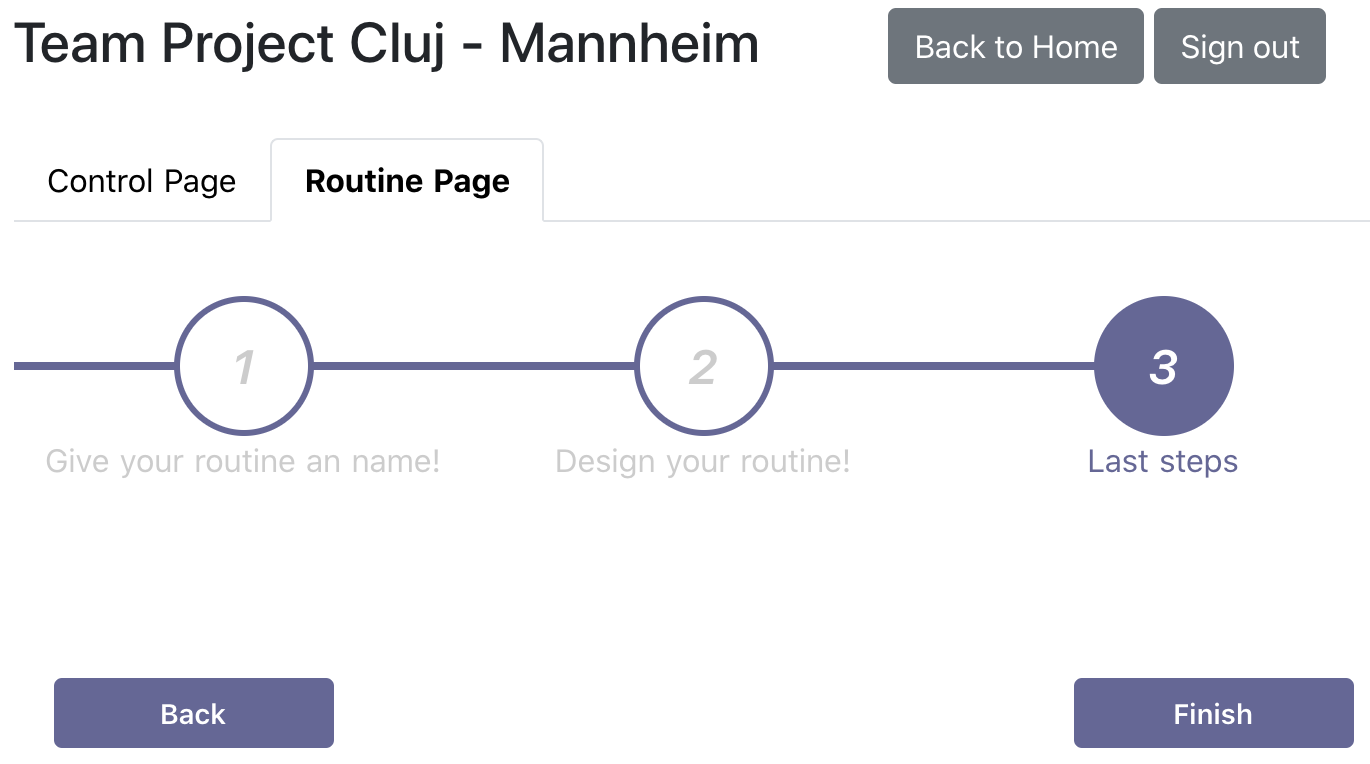
Finally click the “Finish” button.
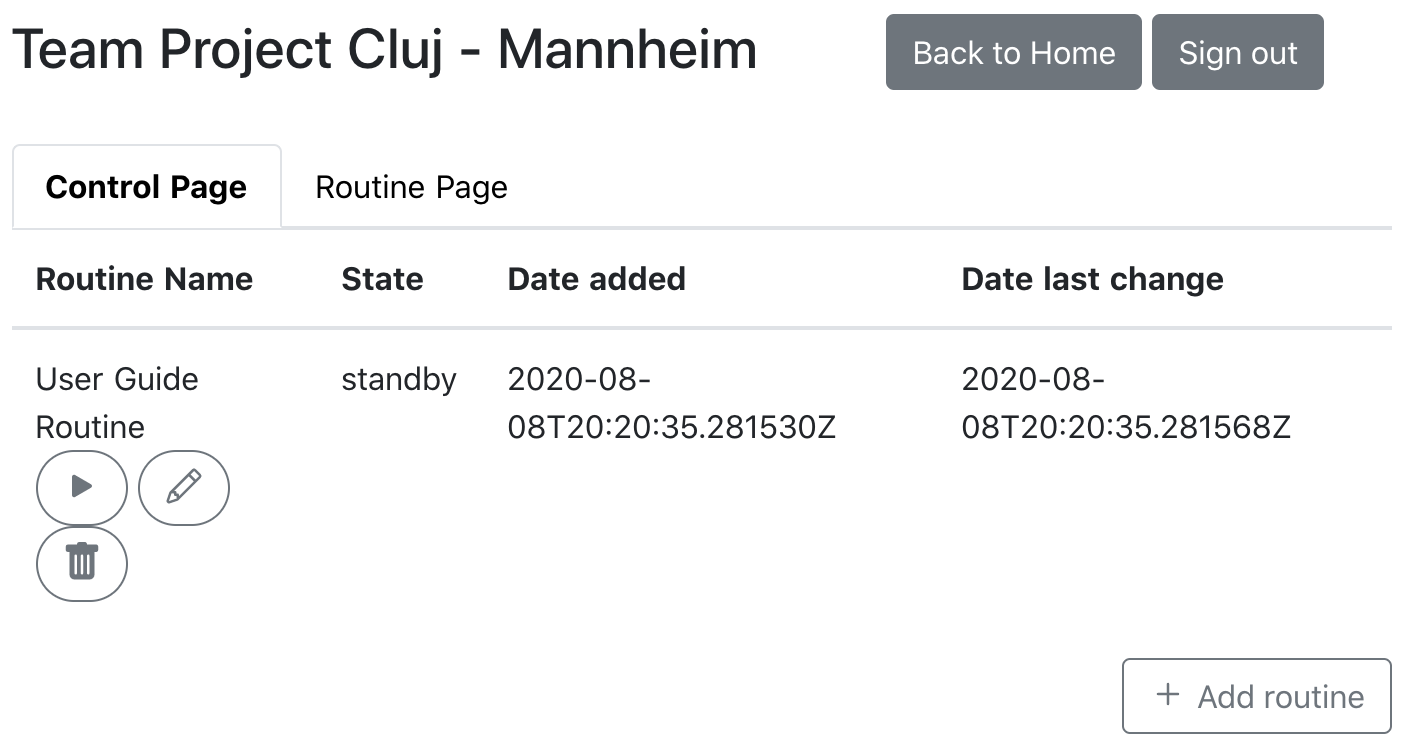
The Routine is now visible in the Control Page. If not visible immediately, try refreshing the page.
Manage Routines
When a Routine is created it is automatically started when the timer condition is satistfied.
On the Control Page the existing Routines can be stated manually by clicking the play button, edited by clicking the pencil button or deleted by clicking the bin button.
Developer Suite
The Developer Suite allows to create, edit and delete Functions or APIs. It is important to mention that Operation and Function can be used synonymous, more precisly Function is only used in the context of the Developer Suite as it behaves like a function in programming. The developer suite requires decent knowledge about several cloud technologies and can render the app to break.
Click the “Switch to Developer Suite” button. Confirm the warning with the “Ok” button.
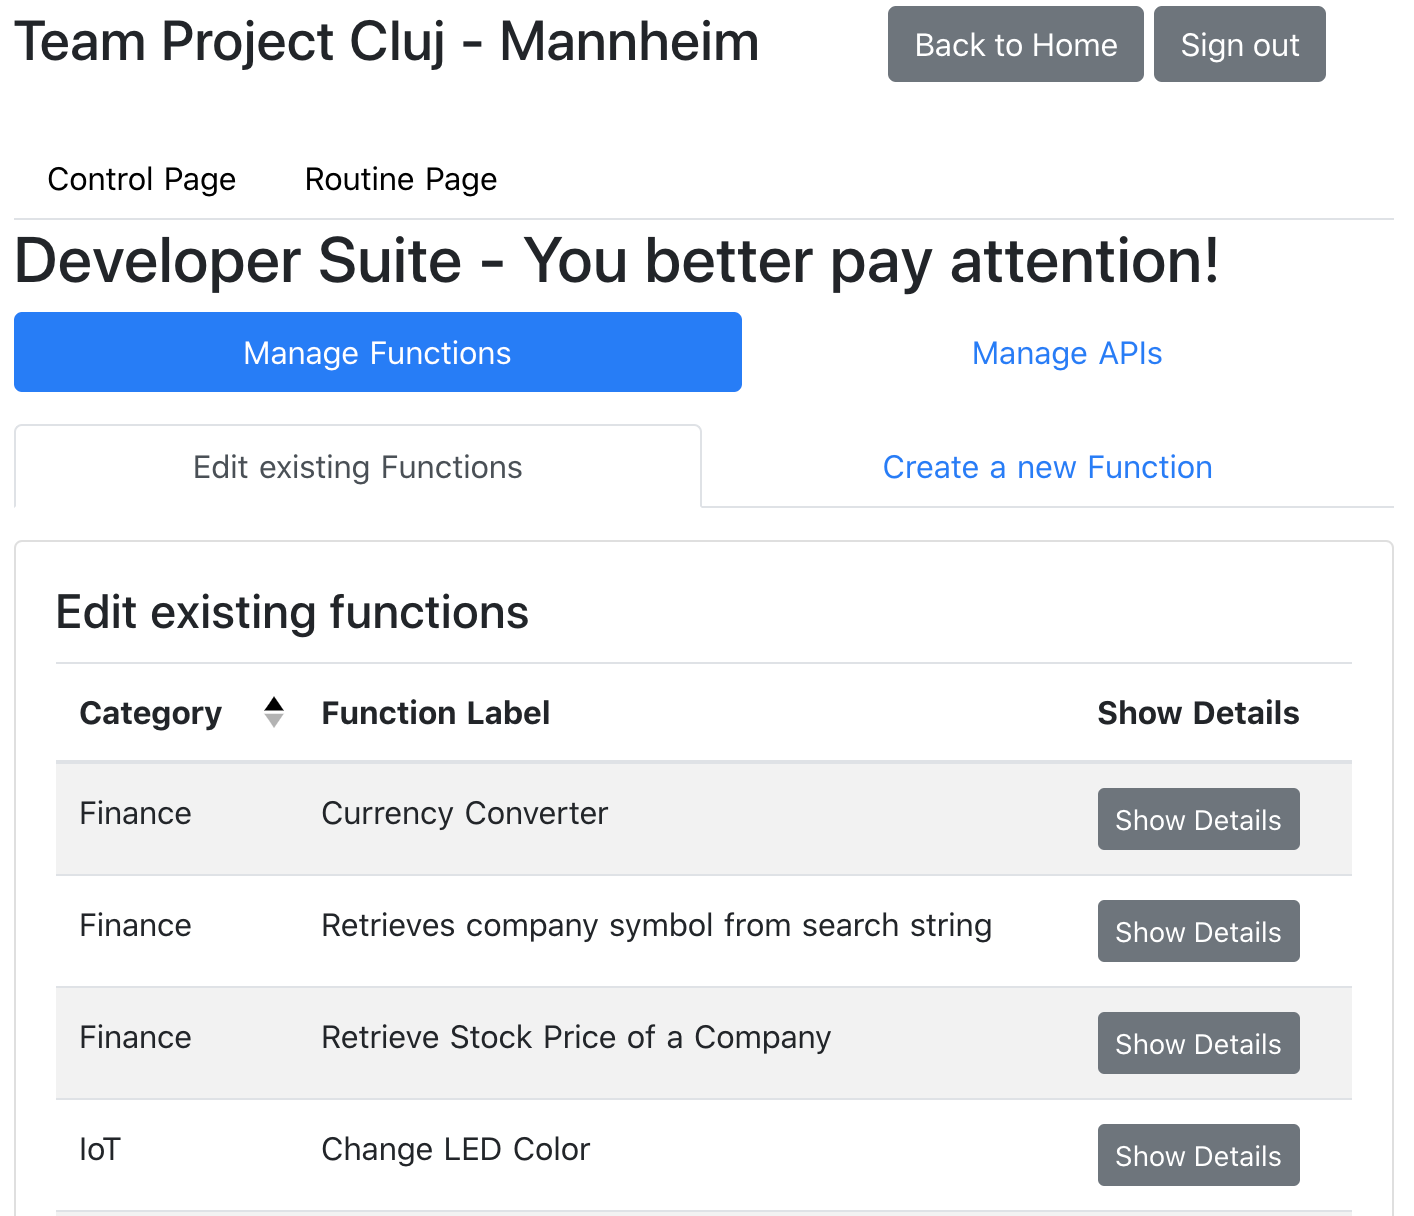
Functions
Since we are already automatically in the Manage Functions mode we have to do nothing.
In case you are not: Click the “Manage Functions” button.
Create
Click the “Create a new Function” button.
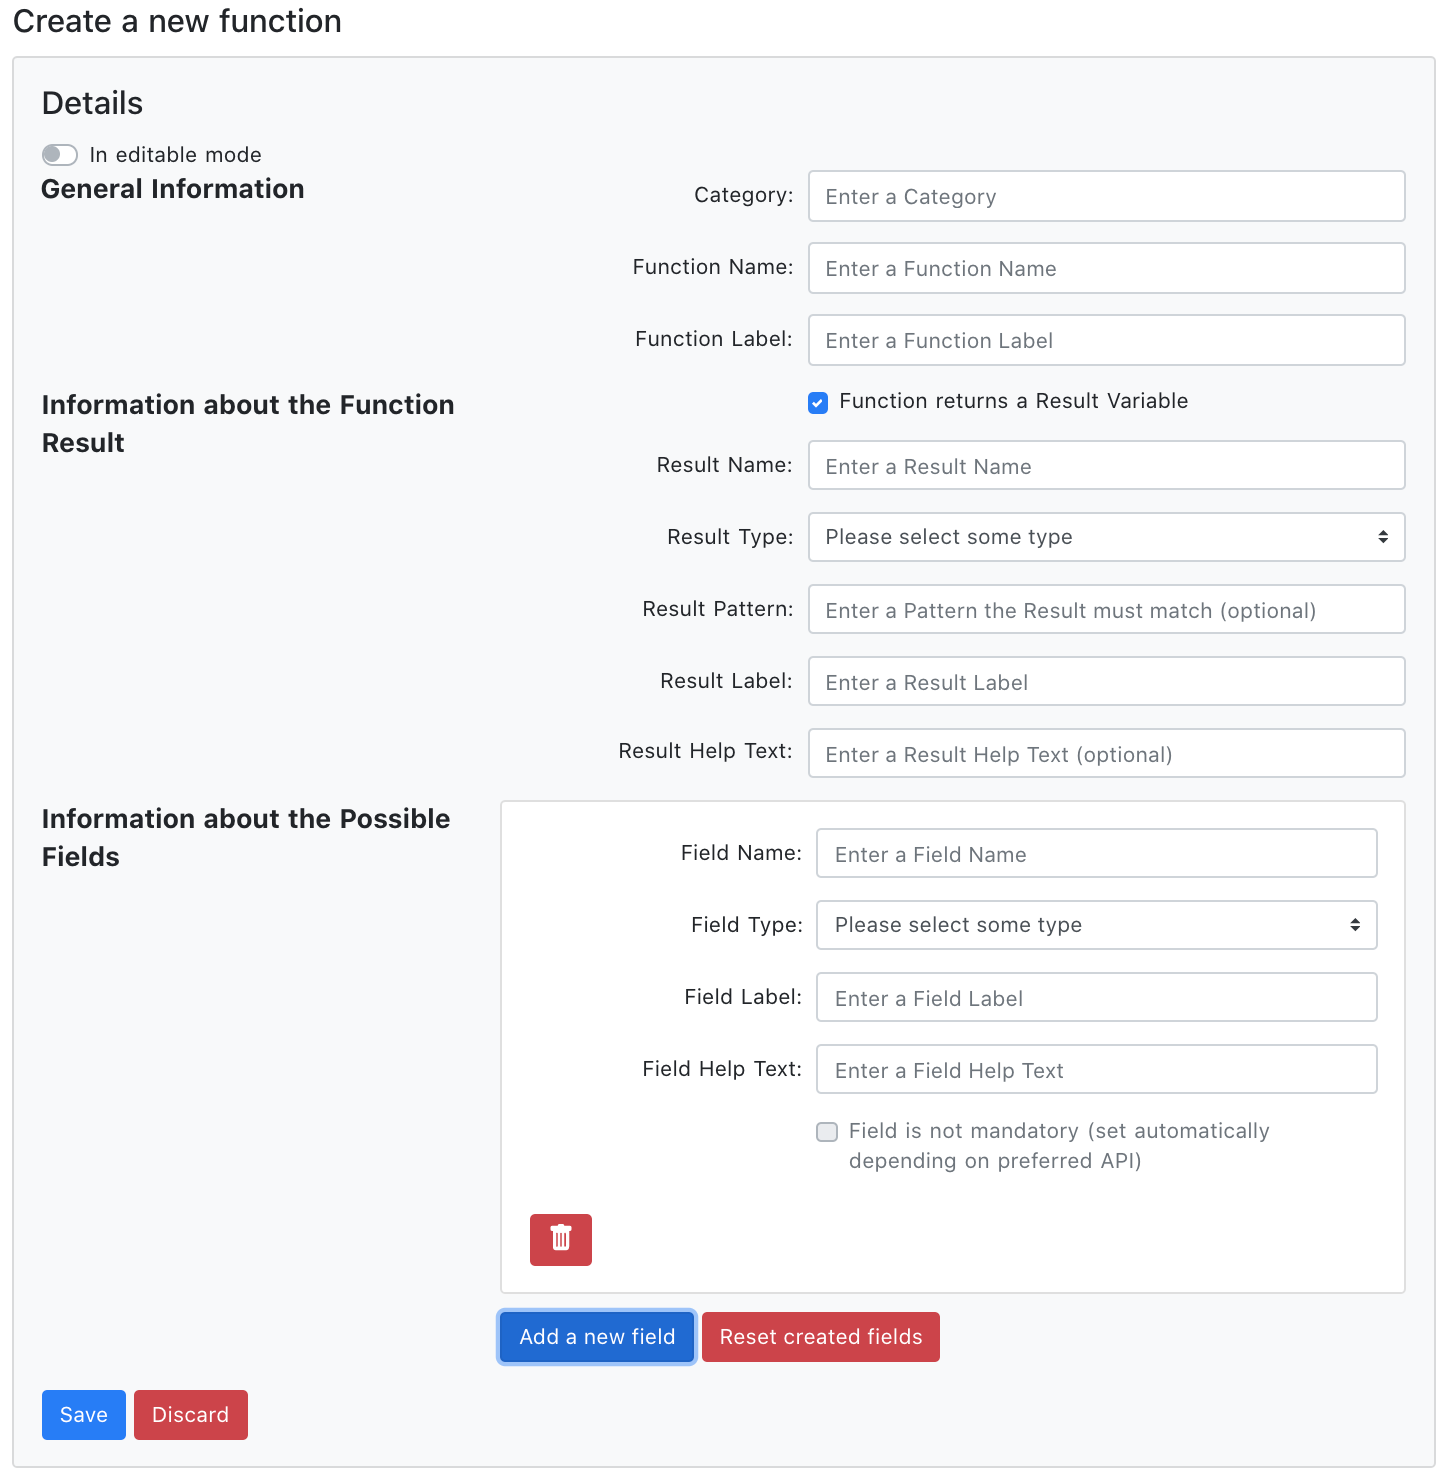
Click on the switch next to “In protected mode” to make the fields editable. Click again to switch to protected mode again.
We now see a number of fields that can or have to be filled.
Category specifies under which category the Function is listed in the Operations in the Routine creation.
Function Name is a unique identifier for the Function that can be a custom string.
Function Label is the label that is displayed for the Operation in the Routine creation.
A result of a Function is optional and can be deactived and activated with the “Function returns a Result Variable” checkbox.
Result Name is a unique identifier for the result that can be a custom string.
Result Type is the value type of the result.
Result Pattern is an optional pattern defined by a Regular Expression and has to be matched by the result.
Result Label is the label that is displayed for the Result in the Routine creation.
Result Help Text is the help text that is displayed for the Result in the Routine creation.
Function fields are optional. They can be added and deleted. The button “Add a new field” adds an additional field. The button “Reset created fields” deletes all fields from this Function.
Field Name is a unique identifier for the field that can be a custom string.
Field Type is the value type of the field.
Field Label is the label that is displayed for the Field in the Routine creation.
Field Help Text is the help text that is displayed for the Field in the Routine creation.
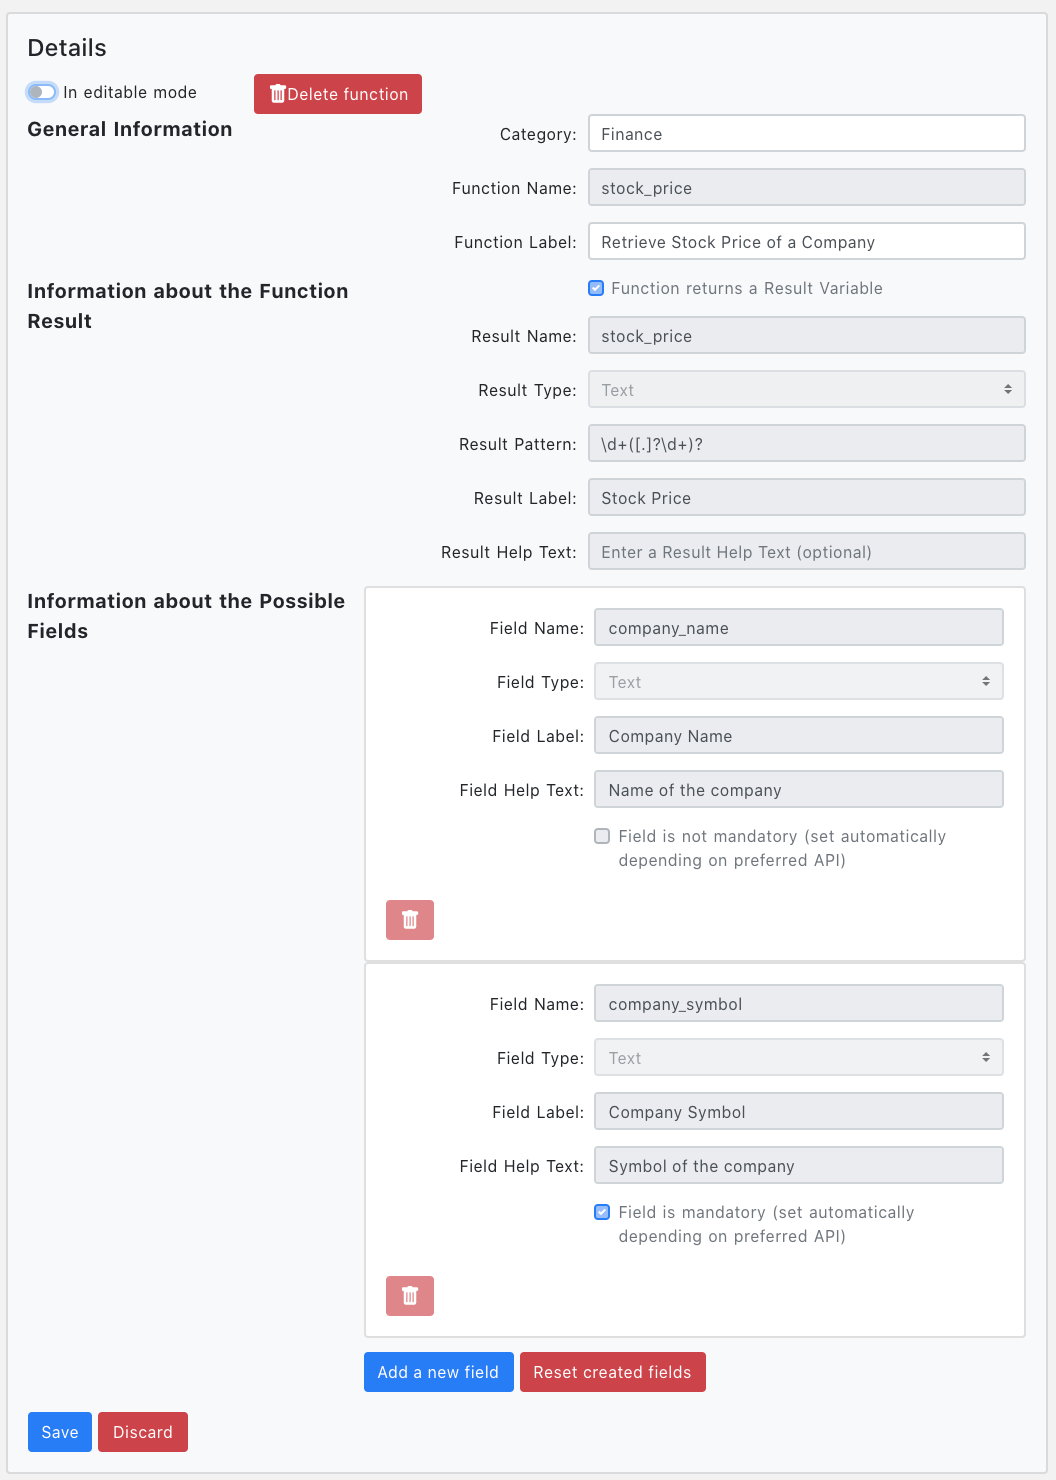
Here you can see an example of how the fields are defined for the “Retrieve Stock Price of a Company” Function.
Click the “Save” button to save the new Function.
Edit
You can edit the fields Category and Function label as well as add and remove fields for existing Functions. To avoid inconsistencies or a new validation of all existing APIs, it is not possible to make further changes to a function after its definition.
Click the “Edit existing Functions” button.
Click the “Show Details” button of the Function you want to edit.
Click on the switch next to “In protected mode” to make the fields editable.
You can now edit the Fields.
Click the “Save” button to save the changes.
Delete
In the editing mode you can also delete existing Functions. Please note that once an Function is deleted all the APIs that belong to the Function are deleted as well.
Click the “Edit existing Functions” button.
Click the “Show Details” button of the Function you want to edit.
Click on the switch next to “In protected mode” to make the fields editable.
Click the “Delete function” button to delete the Function.
APIs
Click the “Manage APIs” button.
Create
Click the “Create a new API” button.
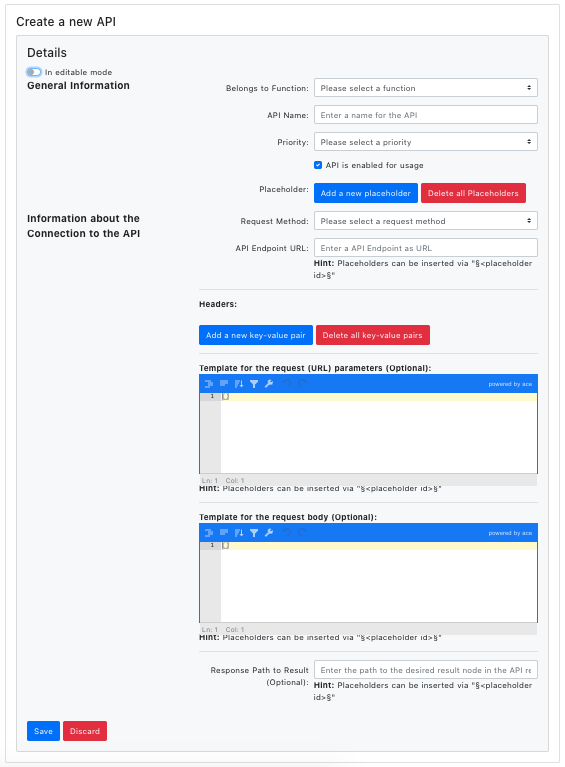
Click on the switch next to “In protected mode” to make the fields editable.
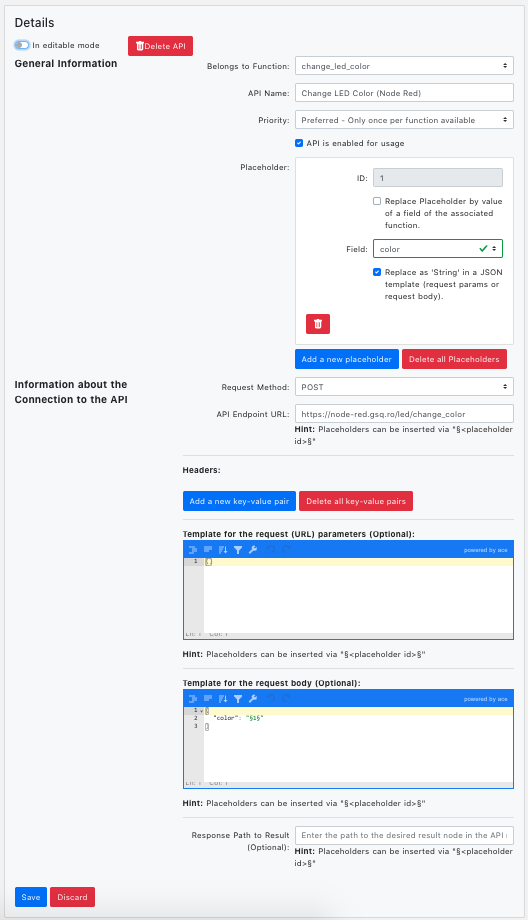
We now see a number of fields to be filled in order to specify General Information about the API as well as how a call to this API must be performed in order to get the desired result for the associated function considering the specified function parameters.
Belongs to Function is the Function that the API implements and can deliver a value for. Use the dropdown menu to select an existing Function.
API Name is the name and unique identifier of the API.
Priority specifies which order the APIs are used to evaluate this function (until one API call is successful). There are four different types of priority values: Preferred, High, Medium, Low. Preferred is the highest priority and can only be set once and is always assigned to exactly one API per Function. If set a second time, the former preferred API’s priority will be downgraded. The preferred API determines which function fields are marked as required, i.e. must be specified when using this function, namely those fields that are required to apply this API.
Placeholders are Placeholders for other values, namely Fields of the corresponding Function or results of other Functions. The Placeholder can be used in other parts of the API definition: Parameters, response path or request body. You can use the Placeholders by inserting “§id§” where “id” is the id of the Placeholder. When an API is called, at first the placeholders are evaluated and afterwards this string gets then replaced by the evaluated value of the placeholder with the certain id.. The exact value of a placeholder is only known when the function is invoked, e.g. because it depends on inputs specified by the user. You can click the “Add a new placeholder”, bin and “Delete all Placeholders” buttons to add and remove Placeholders.
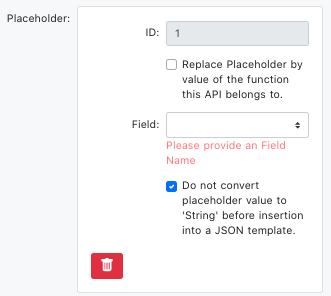
Placeholder ID gets defined automatically and is needed when using the placeholder in other fields.
Placeholder Field specifies the field of the Function which is used to replace the placeholder. You can select in a dropdown menu every field of the Function you defined in the “Belongs to Function” field.
Alternatively to replacing the Placeholder by a Function field it can also be replaced by the result of another Function. Check the “Replace Placeholder by value of the function this API belongs to.” box to switch and click again to switch back.

Placeholder Function name specifies the Function the Placeholder receives the result from.
Placeholder Function Fields can be set if the Function needs some fields to return the value. You can specify fields of the auxiliary function either by selecting the value of a field of the function this API belongs to or by specifying a fix value rightaway. Make sure to specify at least all fields of the chosen function that are marked as required (see corresponding Function specification).
Placeholders can take potentially three primitive datatypes (string, number or boolean). In case of number respectively boolean you can specify if this values should be converted to a string if they need to be inserted into a “URL Parameters Template” or “Request Body Template”. Uncheck the “Do not convert placeholder value to ‘String’ before insertion into a JSON template.” checkbox to convert the Placeholder value to a string, check to leave the orginal value. In case of a placeholder that receives a value of type string, it does not matter whether you check or uncheck this checkbox.
Request Method specifies which HTTP request method is used for the API request which can be selected from the dropdown menu.
API Endpoint URL specifies to which URL the request should be made. You can also use Placeholders in this field.
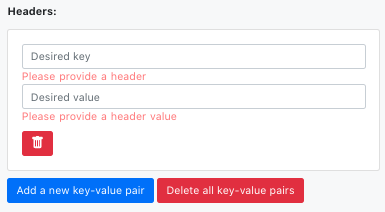
You can add Headers to the API request. Click the “Add a new key-value pair”, bin and “Delete all key-value pairs” buttons to add and remove header fields
In the Template for the request (URL) Parameters field you can add Parameters in the JSON format to the API request. You can also insert parameters directly in the URL when specifying the “API Endpoint URL” field.
In the Template for the request Body field you can add a Body in the JSON format to the API request.
Response Path to Result specifies how the API result is retrieved from the response body. The path is defined by a series of JSON keys that are seperate with a .. Elements in lists can be accessed via their index in square brackets [index]. The sample response path devices.lamps[0].power takes the value under the “devices” key, then the list under the “lamps” key, then the 0. element of that list and then the value under “power” key. If the response is a list itself you can start the path with [index]. It is mentionable, that you can also use placeholders in the response path.
We show an example API definition, the Finnhub Finance API which returns the stock price of a company specified by a custom string.
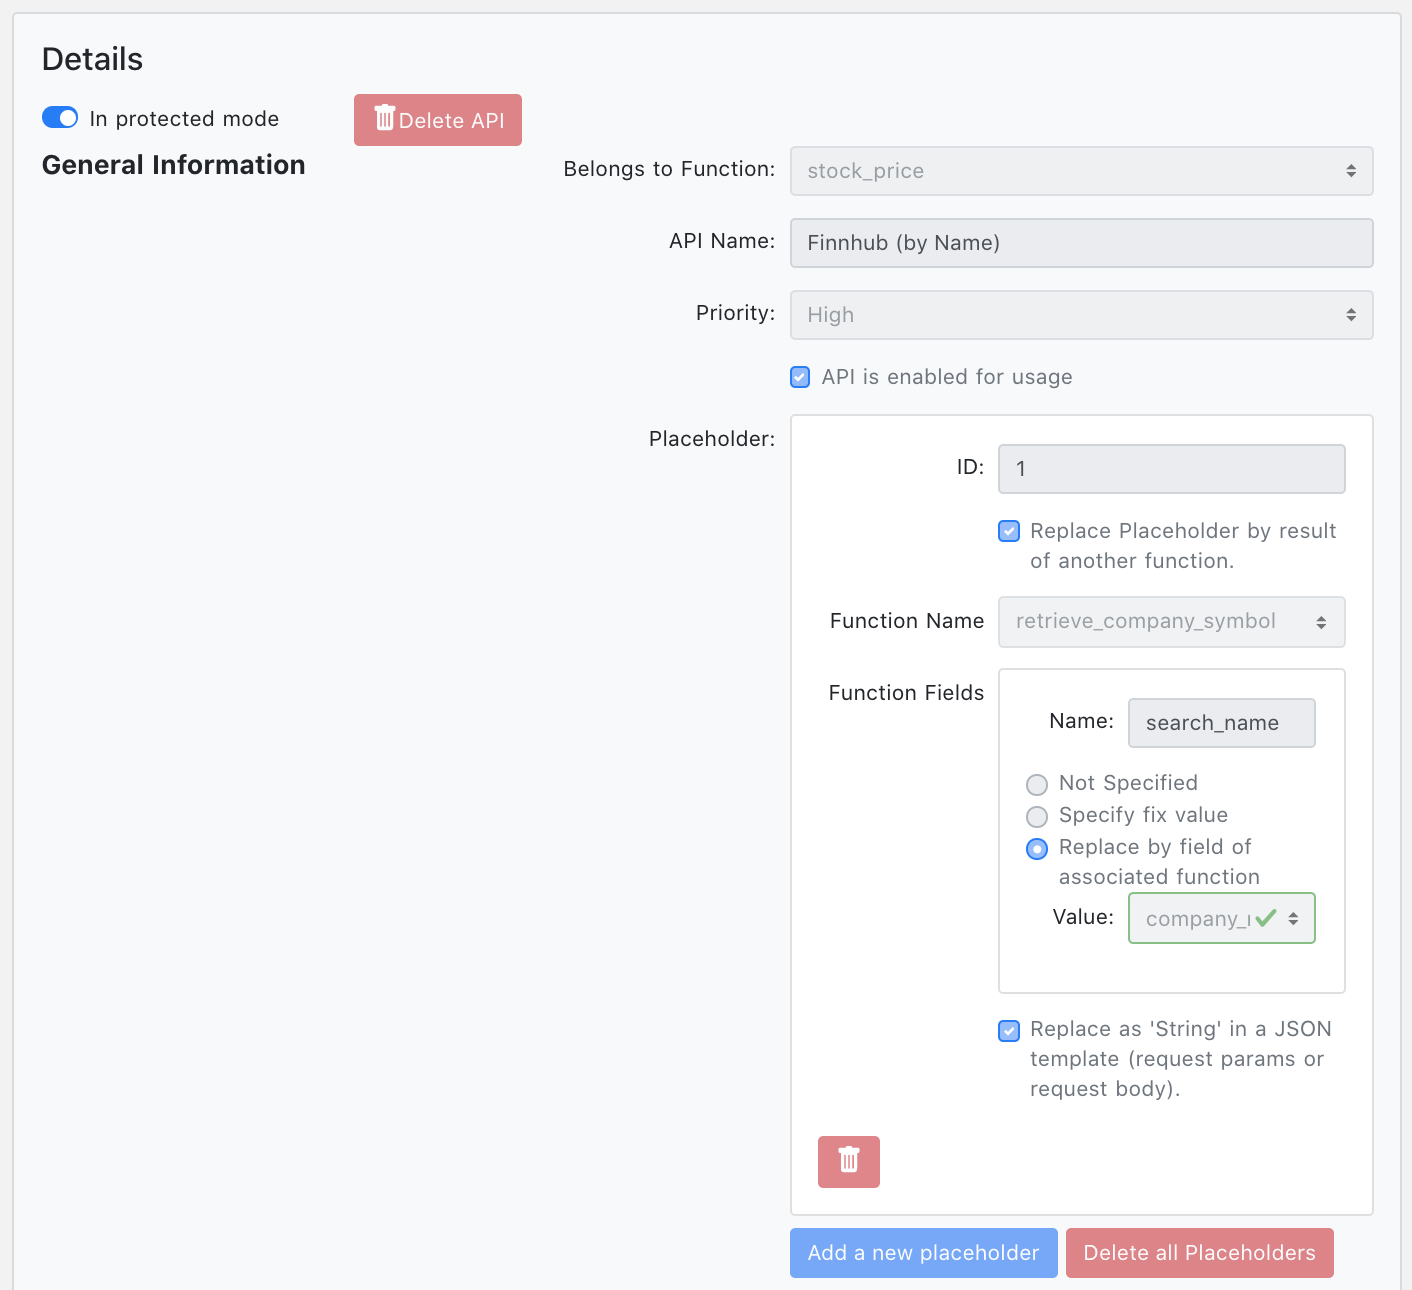
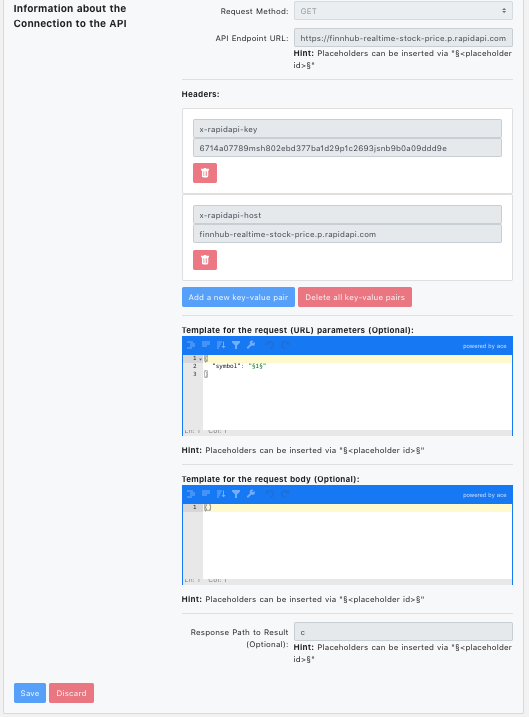
Let us put attention on how the placeholder is evaluated by calling another function named “retrieve_company_symbol” and passing the value of the field “company_name” of the “stock_price” function to which this API belongs. The result of that function call, i.e. the company_symbol, is finally the value of this placeholder and thus inserted into the template given for the URL parameters.
Edit
You can edit all fields of existing APIs.
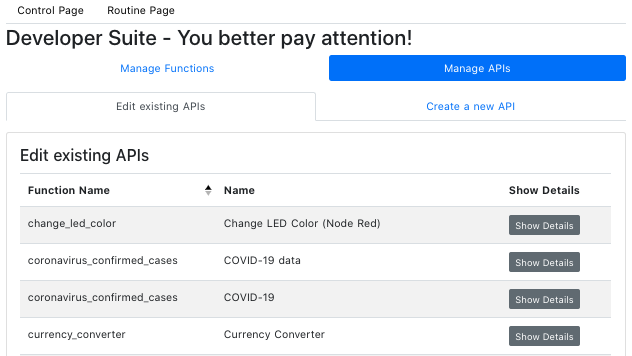
Click the “Edit existing APIs” button.
Click the “Show Details” button of the API you want to edit.
Click on the switch next to “In protected mode” to make the fields editable.
You can now edit the Fields.
Click the “Save” button to save the changes.
Delete
In the editing mode you can also delete existing APIs.
Click the “Edit existing APIs” button.
Click the “Show Details” button of the API you want to edit.
Click on the switch next to “In protected mode” to make the fields editable.
Click the “Delete API” button to delete the API.